Playing Icewind Dale with GameSpy Arcade
You've played games, but never like this. GameSpy Arcade represents
an evolutionary step forward in online gaming, bringing players together and
helping them find servers for their games with greater ease than ever before.
Before starting Icewind Dale or Heart of Winter, get the lastest patch from PlanetBaldursGate. You'll also find loads of information to help you plan
your strategy or customize your game at PlanetBaldursGate.
Part 1: Getting Arcade
The first step to playing games in Arcade is … downloading
Arcade. (Didn't see that one coming, did you?) If you've already downloaded
and installed Arcade, move on to the next step. If not, follow these simple
instructions:
- Point your Web browser to the Arcade download
page. If you're not sure if your system can handle Arcade, take a quick
look at our download
help page for the Arcade's minimum system requirements. If everything
checks out, you're good to go.
- A window will automatically pop up and show you a progress meter. Don't panic, this just downloads the Arcade installation program to your hard drive and then starts it.
- Once the download is complete, the Arcade installation will begin. Follow the instructions until
the installation process is complete.
That's it. Pretty painless, eh? Now you're ready to fire up Arcade and get
into some hardcore gaming.

If your game doesn't
appear under the Games tab, be sure to Scan for Games from the GameSpy
menu. |
|
Part 2: Is your game listed in Arcade?
One of the first things that Arcade does when you launch the program is to
scan your hard drive for games that Arcade supports. Don't worry. It's not
looking for any information that you might want to keep private. Also, whenever
you install a new game, and then launch Arcade, the software will automatically
ask you if you want to download support for the new game.
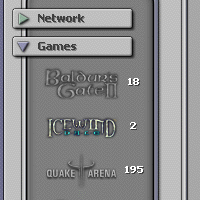
Once it finds a game that it supports, Arcade will add a tab to the
navigation bar on the left-hand side of the software window, under the "Games"
heading. Clicking on this tab will take you to the game's chat room / staging
area in Arcade, from which you can meet and greet other players, find servers to
play on and much, much more (see "Finding a server" and "Joining a game" below).
If Arcade doesn't find a supported game that you know you have installed,
don't worry. You can add the game manually in a matter of seconds. Just open the
GameSpy menu, click "Options," then "Games." A window will open listing the same
headings that you see in the actual software window. Click on the "Not
Installed" button, and select the game you're trying to add from the list that
appears. Now, click "Browse" and locate the executable (file extension .exe) on
your computer. This will add the game to your list of installed games, and allow
you to join servers in Arcade.
Part 3: Finding a game
Everyone has their own set of criteria for finding a server in which to game.
Some folks are looking for servers playing a specific mod or map, while others
are chiefly concerned with ping or finding where their friends are playing.
Arcade makes all of this incredibly easy.
-

Arcade makes it
easier and faster than ever to find game rooms. |
|
Join a Game Room
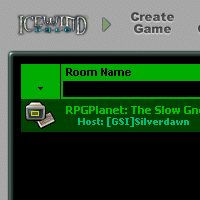
To join a game room, double-click on it in the upper window. The Players
column will let you know how many people are in there, and the "Ping"
column will show you how good your connection to the server is -- the lower
the ping the better! Once you've double-clicked on a room you want to join,
you'll enter the setup room for the game. Instead of all the noise of the
main game room, you'll just be chatting with the people you're going to play
the game with. You can argue about rules or teams or who's got the coolest
nickname.
- Check the Map
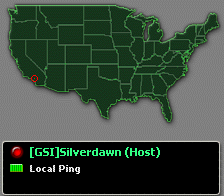
Now, how cool is the that map? It shows geographically where all the players
in the room live. And it's even cooler than you think: Click on it to switch
from a world map to a U.S. map. Oh, but if a player doesn't enter their zip
code in their profile, Arcade won't be able to locate them on the map -- so
enter your zip code! Under the map, you can see everyone's connection speed;
hopefully, everyone's about equal. The red and green dots next to everyone's
name indicate if they're ready to start the game or not (green means ready,
of course).
- Ready up!
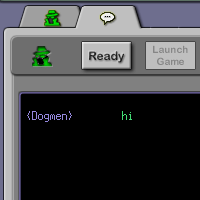
Click on the big "Ready" button at the top of the screen to indicate
that you're ready to go. (If you want to bail out of the game, you can always
click the "Leave" button in the top left corner to go back to the
main room.)
-
|

For
peer-to-peer games, the map will show the location of each player,
provided they have entered their ZIP code in their Arcade profile.
|
|
Play!
Once everyone has readied up, the game host can launch the game by clicking
the Launch button. Everyone in the game room will automatically launch
into the game, and soon, you'll all be playing together. Simplicity!
Finding friends: Arcade's PlayerSpy feature allows you to keep
track of all of your Arcade-using pals. Once you've selected someone to be part
of your buddy list, Arcade will keep track of them for you. You can find out
what servers they've joined simply by scanning the server list for the "Buddy
Spied" icon (a small magnifying glass).
When you've found a server marked with the "Buddy Spied" icon, you can right
click on the server's listing and obtain the list of players currently gaming on
it. This will enable you to see exactly which one of your friends is in the
server.
Ping: This works in exactly the same way as it does in
GameSpy 3D and your typical in-game server browser; the lower the ping, the
smoother your online multiplayer experience. Arcade allows you to sort servers
by ping, so you can easily find the server with the lowest ping for your
connection.
Part 4: Starting a game
- Pick your game.
Click on the icon of the game you want on the left side of the program.
You'll go to a chat room for that game.
-
|

Players
signify they are ready to play a peer-to-peer game by clicking
the Ready button. When everyone's ready, the game host will
launch the game.
|
|
Click on the "Create Game" button.
This will create your own room that other people can join. To get it set up,
type in a name for your room, set the maximum number of players and select
the game type. Tip: Name your game room something helpful. Something
like "Southern California 2-on-2 teamplay" tells people what type of server
you're running and where it is, which is nice. "Everyone sucks but me!!" is
certainly catchy -- but not as helpful. But hey, it's your call.
- Wait for people to join.
It won't be long before people will start coming to your game room. You'll
be able to chat with players as the room fills up.
- Check the Map
Try to ensure that everyone has a good connection to your game. Look at the
little status bars by their names. If any single player has a really bad connection,
it may mean a bad game for them, or worst case scenario, they may mess up
the game for everyone who's playing.
- Ready up and start the game!
Once everyone has clicked the Ready button (the light next to their
name will turn green), just press Launch Game to start.
Part 5: Problems?
Arcade is committed to providing you with the best possible online gaming experience.
If you have problems using Arcade, whether installing the program, registering
it, or using it in conjunction with your favorite game, we want to help. Check
out our help pages or
e-mail us.
|

